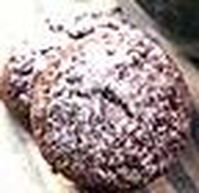
 Little Cocoa Delight Bites are great for serving on a platter for your guests at any get-together or occasion.
Makes 48 little cookies You’ll need: Non-stick cooking spray 1/3 cup cocoa powder 1/4 cup butter, softened 3/4 cup sugar or Splenda for baking 1/4 cup applesauce 1 tsp. vanilla extract 1-1/2 cups All-purpose flour 1 tsp. baking powder 1/4 tsp. salt 1/4 cup powdered sugar Preheat oven to 375 degrees. Coat two cookie sheets with a non-stick cooking spray. In a small bowl stir together flour, baking powder and salt. In a medium size bowl (or Kitchen Aid) place cocoa powder, butter and sugar and beat with mixer. Next add the apple sauce and vanilla extract and mix until completely blended. Stir flour mixture into cocoa batter with a stiff spatula or wooden spoon. Shape batter into 48 “marble-sized” balls. Arrange cookie balls at least one inch apart on cookie sheets. Bake about 8 minutes – until set. Remove from oven and allow cookies to stand for only one minute. Remove to wire rack to cool and with a plate underneath; sprinkle cookie bites with powdered sugar. Just pop one in your mouth and enjoy! Note: Store extra cookie bites in a freezer container or plastic bag to keep freshness.
0 Comments
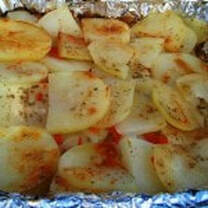 Serving: 8-10
You’ll need: 6 to 8 medium to large potatoes 2 Tbsp. salt 1 medium onion, sliced 2 – 3 Tbsp chopped red bell pepper 2 – 3 Tbsp. olive oil 1/4 cup light butter stick, sliced in 1 Tbsp. pads Salt and pepper * Garlic powder * Paprika season to desired taste* 1 Square 3” high 9″ x 9″ Aluminum Baking Pan Aluminum Foil First things first: I line the square aluminum baking pan with aluminum foil. This will make clean up a snap after the dinner is done. Then I slice the onion and chop the red bell pepper. Remaining onion can be stored in the fridge and the remaining red bell pepper can be stored in the freezer in a freezer safe container. This way when I make this recipe again I don’t have to chop the red bell pepper if I already have some frozen. Fill a bowl that is large enough to hold all of the potatoes about half full of water and add a couple of tablespoons of salt and mix thoroughly. This is where I put the potatoes after I peel them so that they don’t turn brown while I am peeling the rest of the potatoes and it brines the potatoes a bit too. Peel the potatoes and put them in the salt water. When done with the peeling, slice the potatoes and Pour Olive Oil in the aluminum baking pan enough to thinly coat the bottom. Build the Frank-Potatoes: 1. Put down a layer of sliced potatoes enough to cover the bottom of the pan but try not to overlap the slices. 2. Add salt and pepper to taste and sprinkle garlic powder over the layer. 3. Separate the onion slices and sprinkle them over the layer. 4. Sprinkle a tablespoon of chopped red bell pepper over the layer. 5. Put about 4 pats of butter on the layer. 6. REPEAT STEPS 1 thru 5 until you have reached the last layer then continue below. On the last layer of potatoes add salt and pepper, garlic powder and just a GENTLE dusting of the paprika. Finish it off with a drizzle of olive oil and cover the entire thing with another sheet of Aluminum Foil. Put on the Grill on High Flame for 30 to 40 minutes. 45 minutes will be good if you are like me and enjoy the “crispies” that get extra brown on the bottom of the pan. Frank’s Note: The leftovers can be used for another meal by frying them in a pan with a little more olive oil and butter. My wife, Karen, really loves these cooked up with some eggs and mushrooms and served with her homemade favorite salsa recipe for breakfast! 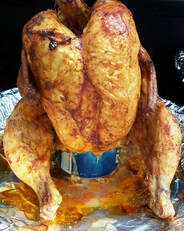 This is a unique and very tasty way to smoke a whole chicken without the need of a rotisserie setup. Karen just loved this the first time I made it and it has become a regular dish at our house.
It is not difficult to make but does take a little preparation. Here is what you will need; 1 – 3-1/2 to 4 pound whole chicken 1 – 8 oz Can of Beer (your choice, I use Bud Light or Bud) Olive Oil Apple Wood Chips (Soaked for about 2 hours) For the Rub: 1 Tbs. Sweet Paprika 1 teaspoon garlic powder 1 teaspoon onion powder 1 teaspoon Coarse Salt 1 teaspoon Fresh ground black Pepper 1 teaspoon Sweet Chili Ancho Powder 1/2 teaspoon Cayenne Powder 1 Tbs. Brown Sugar Set your grill for indirect grilling and let heat to about 300 degrees F. Rinse the chicken under cold water and pat dry. Pour about half of the can of beer into a spray bottle because you don’t need the beer can to be full. Then use a “Church-Key” to make 3 more holes in the top of the can. Sprinkle a teaspoon of the Rub in the beer can and don’t worry if it fizzes up, it is supposed to do that. To prepare the chicken, rub it completely down with Olive Oil and massage it into the fleshy parts of the chicken, the thighs and the breasts. Cover the chicken all over with the Rub that you prepared and make sure to get inside the thighs and under the wings. I prefer to put my rub under the skin on the breast. To do that, I slide my fingers under the breast skin and use a butter knife to help separate the skin from the breast. Then I put the rub under skin right on the breast. This helps to make sure the flavor of the rub has a chance to cook into the breast meat. Also, sprinkle some of the rub inside the cavity of the chicken. Slide the beer can into the largest cavity of the chicken and make sure that it will sit upright. There are holders that you can buy for this but I generally use the beer can and the chicken legs to keep it upright and that works just fine. Put the Beer Can Chicken on the grill. You might also want to put a flat drip pan under your chicken or below the grill grate because the chicken will drip juices. I find a flat 10" or 12" aluminum pie pan works great. Add your Apple wood chunks or chips to your charcoal or smoke box and let the chicken smoke for about 1-1/2 hours and make sure to spray the beer that you put in the spray bottle about every 15 minutes or so. This will help to keep the outside of the chicken moist. Use your meat thermometer to check the chicken by putting it in the deepest part of the thigh, usually from the back side of the chicken. You should see clear juice drip out when you insert the thermometer. When the thermometer shows 170 to 180 degrees F then your beer can chicken should be fully cooked. When finished, take the whole Beer Can Chicken assembly off of the Grill and remove the beer can before serving. Tent the chicken and let it sit for about 5 to 10 minutes before serving. Be careful as everything will be quite hot. Bon Apetit! If you want to kick your chicken up a notch, before smoking it, you can brine it in 1 can of beer, enough water to cover it, 4 peppercorns, 3 cloves and Bay leaf. Cover and leave in the refrigerator for 12 to 24 hours. |
Karen VerduscoAlways reinventing myself by creating new recipes or craft ideas. All photos are genuine. Please send me an email or recipe you liked or tried. Categories
All
Archives
June 2017
|
-
Products
- Belts >
-
Billfolds, Clutches and Wallets
>
- Leather Clutch / Wallet
- Ostrich Leather Clutch Wallet
- Biker Long Leather Wallet
- Large Leather Billfold
- Slim Credit Card Wallet
- Slim Debit Wallet
- Deluxe Leather Roper Wallet
- Leather Biker Wallet
- Leather Billfolds
- Minimalist Leather Credit Card Wallet
- Deluxe+ Leather Roper Clutch/Wallet
- Leather Roper Wallet
- Bolo Tie
- Book Cover
- Business Card Holders
- Can Koozies with Handles
- Coin Pouches >
- Cosplay Leather Pouches
- Handbags and Purses >
- Java Jackets
- Knife Sheaths >
- Leather Jewelry >
- Luggage Tags
- Motorcycle Leather >
- Phone Holster
- Picture Frames >
- Remote Control Caddy
- Rodeo Buckles
- Strap Handles
- Tool Pouches
- Valet Tray
- Watch Band
- Wedding Guest Book
- Leather Blog
- Recipes
 RSS Feed