|
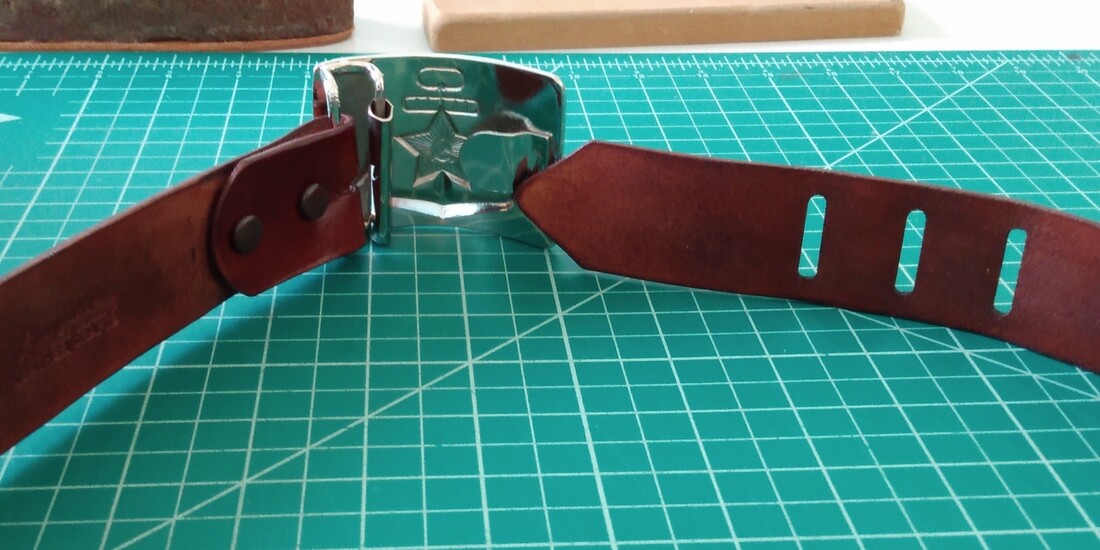
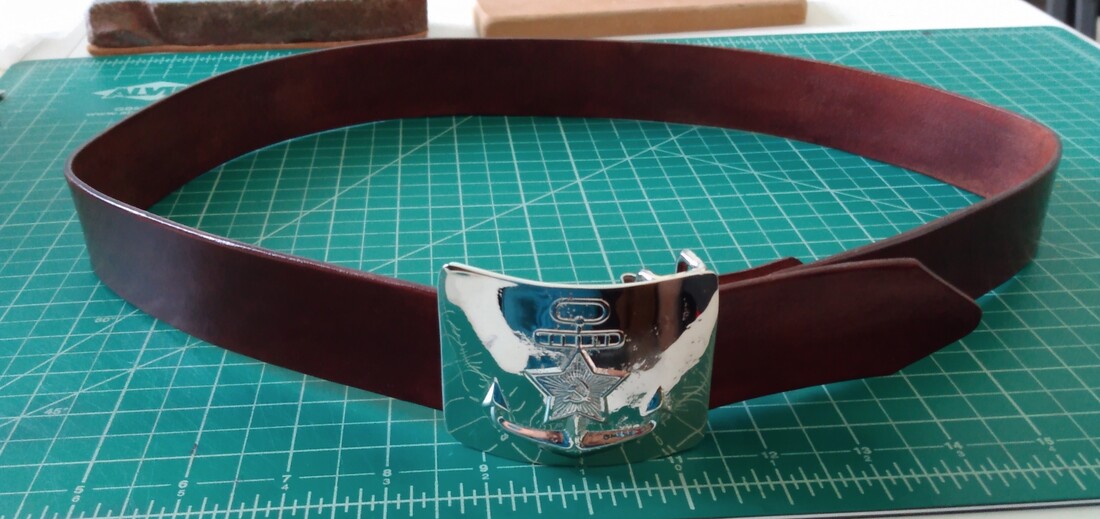
Belts can be interesting to make. The basics are knowing the wearer's waist size, width of the belt and buckle preference, as well as the color. However, designs that the customer would like on the belt can sometimes require a bit more thought, time and patience. Another decision, which can sometimes be a significant choice for how the belt will look, is the buckle. There are numerous types of buckles from the basic heel-bar buckle, which you find on most dress belts in the department stores; to the Center-bar buckle, like the one on the black belt below; to the decorative buckles on western style belts; to the large Cowboy buckles which can also include the large oval buckles with various designs. The belts below took a little extra time to develop. Once the positioning for the lettering on the black belt for my biker customer was determined and orange dye applied, the rest of the belt was carefully dyed black. The technique for applying either the orange dye or the black dye is to use a small paint brush to apply the dye being very careful to stay within the lines for the orange dye and outside the lines for the black dye. It is surprising how long a process this can be to make sure that it looks the way you want it to for the customer. The Brown belt with the Russian Navy belt buckle had a uniquely large tongue to connect the buckle to the belt. The customer did not want the slots that I punched in the belt to show, so, I made some calculations to ensure that they would be hidden behind the buckle. The customer was pleased with the way the belt turned out. He also had me make a black one for a Russian Military belt buckle. Both buckles were a part of his family's heritage. I enjoy making belts like these for my customers and it is satisfying when the look on their face makes it all worthwhile. Until next time, All the best. Frank, the KC Leather Guy 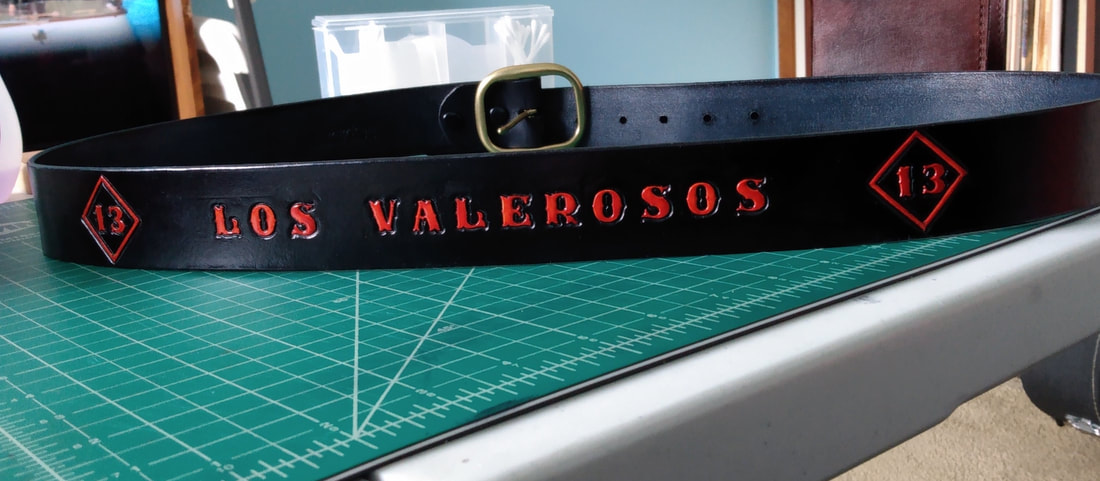
0 Comments
One of my favorite things about leatherwork is being able to use my creativity to make leather items that are useful. I've made several knife sheaths and I have my own design for keeping the knife blade from cutting the stitching or lacing. I stiffen a half inch wide piece of 8 to 10 oz leather and then wet form it to the curvature of the knife sheath. It then gets stitched between the front and back sides of the knife sheath and burnished smooth. This protects the stitches from being cut and it works like a charm. A new customer ordered this knife sheath for his boning knife. He did not like the sheath that came with the knife when he bought it. So I pulled out my materials and went to work. He requested black and I'm glad he did because it looks pretty sweet. When he stopped by to pick it up, he raved at how awesome it looked. There are many, many styles of knives for which customers would like a knife sheath custom handmade. The difficulty here is that it helps to HAVE the knife so that a template can be created. Once the template is created then it is just a matter of determining the color and any design that the customer would like carved, stamped or sculpted on the sheath. Knife sheaths are leather items that I enjoy making for customers and, soon, I will be including them in our website so that customers can view and order them. Until next time, All the best. Frank, the KC Leather Guy
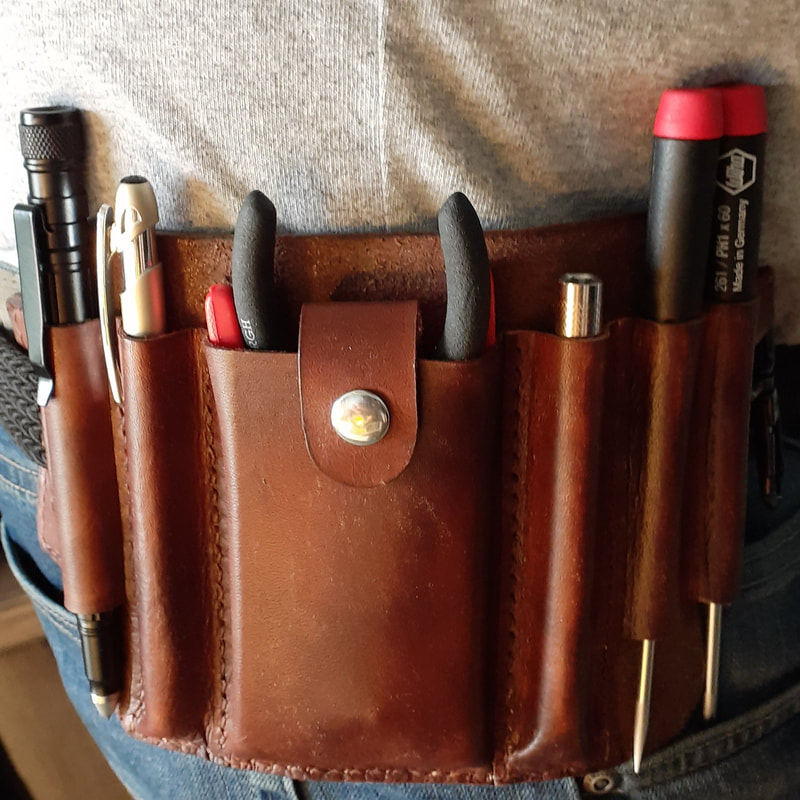
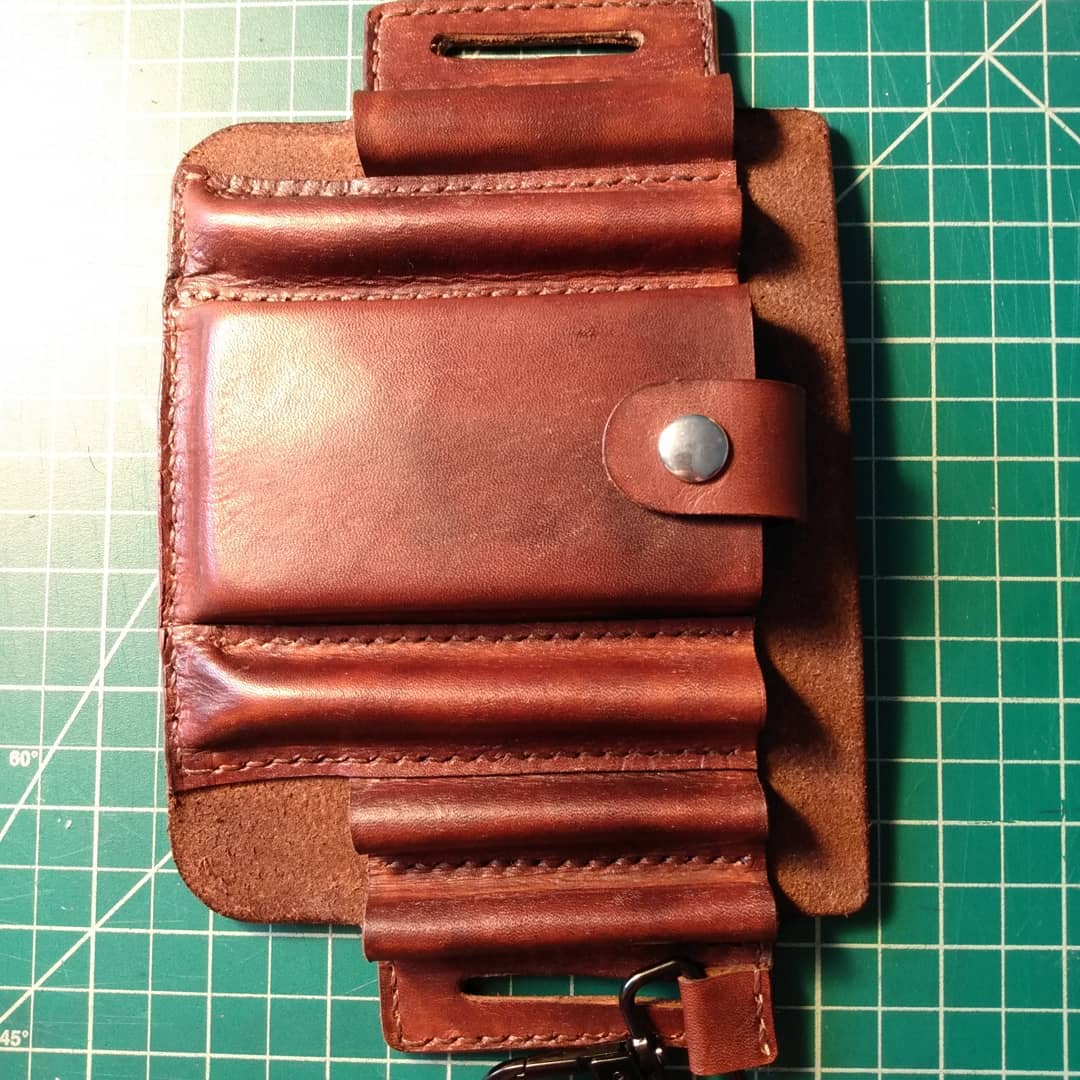
We have been getting several orders for many different kinds of leather products. This is actually what I like most about doing leatherwork for customers, the variety and the challenge for which I am happy to apply my creativity. Most recently, I made this custom tool pouch for one of my leather customers who does TV repair. He had specific requests which required me to create my own pattern from scratch. Without having his tools to use for making accurate measurements, I improvised with my leather tools that were approximately the same diameter. This way I could wet-form each component of the pouch to fit that specific tool that he requested to be able to carry on the pouch. Allow me to expand on "Wet forming". This is a process/technique by which we completely wet the leather then place it in a "form" and let it dry overnight to maintain the shape required for that specific component. As can be seen by the large rectangular pouch for the two uniquely shaped pliers, I took a piece of wood, shaved and sanded the edges and corners then wrapped the wet leather around it and placed everything between my granite pounding blocks ... sometimes you have to improvise if you don't have the exact size block or dowel to do the wet forming, as was the case with this project. Then, of course, there is the placement and punching of the stitching holes. Always trying to keep the stitching line straight to make it look like it was done by machine when, in fact, I do ALL of my stitching and lacing by hand. The customer was very impressed by the tool pouch and was willing to pay a pretty penny for it. Again, this is what makes this all worthwhile for me, seeing the customer's face and hearing their positive comments about how much they like the product. Until next time, All the best. Frank, the KC Leather Guy |
AuthorsKaren is an Artist who enjoys painting and inspires many of the Leather jewelry products that we offer. Frank is a Leather crafter who is very detailed and designs the custom Leather products that we create, many of which Karen has painted. As products are inspired and created, we will put them up for display on our website. Archives
July 2021
Categories |
-
Products
- Belts >
-
Billfolds, Clutches and Wallets
>
- Leather Clutch / Wallet
- Ostrich Leather Clutch Wallet
- Biker Long Leather Wallet
- Large Leather Billfold
- Slim Credit Card Wallet
- Slim Debit Wallet
- Deluxe Leather Roper Wallet
- Leather Biker Wallet
- Leather Billfolds
- Minimalist Leather Credit Card Wallet
- Deluxe+ Leather Roper Clutch/Wallet
- Leather Roper Wallet
- Bolo Tie
- Book Cover
- Business Card Holders
- Can Koozies with Handles
- Coin Pouches >
- Cosplay Leather Pouches
- Handbags and Purses >
- Java Jackets
- Knife Sheaths >
- Leather Jewelry >
- Luggage Tags
- Motorcycle Leather >
- Phone Holster
- Picture Frames >
- Remote Control Caddy
- Rodeo Buckles
- Strap Handles
- Tool Pouches
- Valet Tray
- Watch Band
- Wedding Guest Book
- Leather Blog
- Recipes


 RSS Feed